Our instructor, John Rimmington-Shaw is a wonderful man who was previously a stonemason but became disenchanted because so many people have gone towards decorating with stone, i.e. creating facades, instead of using it structurally. He went to the UK to learn how to build dry stone walls after experimenting a bit on his own property and is now the founder and president of the Dry Stone Wall Association of Canada. (If anyone is interested in learning the art of dry stone walling, John leads demonstrations and classes all over the place you can find links to the classes on the dswac website linked above.)
After teaching us the basics in about an hour we set off to the School of Horticulture on the Niagara Parkway, which is a gorgeous place to take walks if you are ever in the area. We started off by looking at some garden sculptures or follies, that John and other groups had previously built. They call them respectfully, the Cheese Wedge and the Veg Wedge:
 |
| The Cheese Wedge: It's very hard to see in this picture but there are is a hole through the centre of it and cool corbeling at the sides, so that it looks like a big slice of swiss cheese. (It is also in a pumpkin patch, which is cute.) |
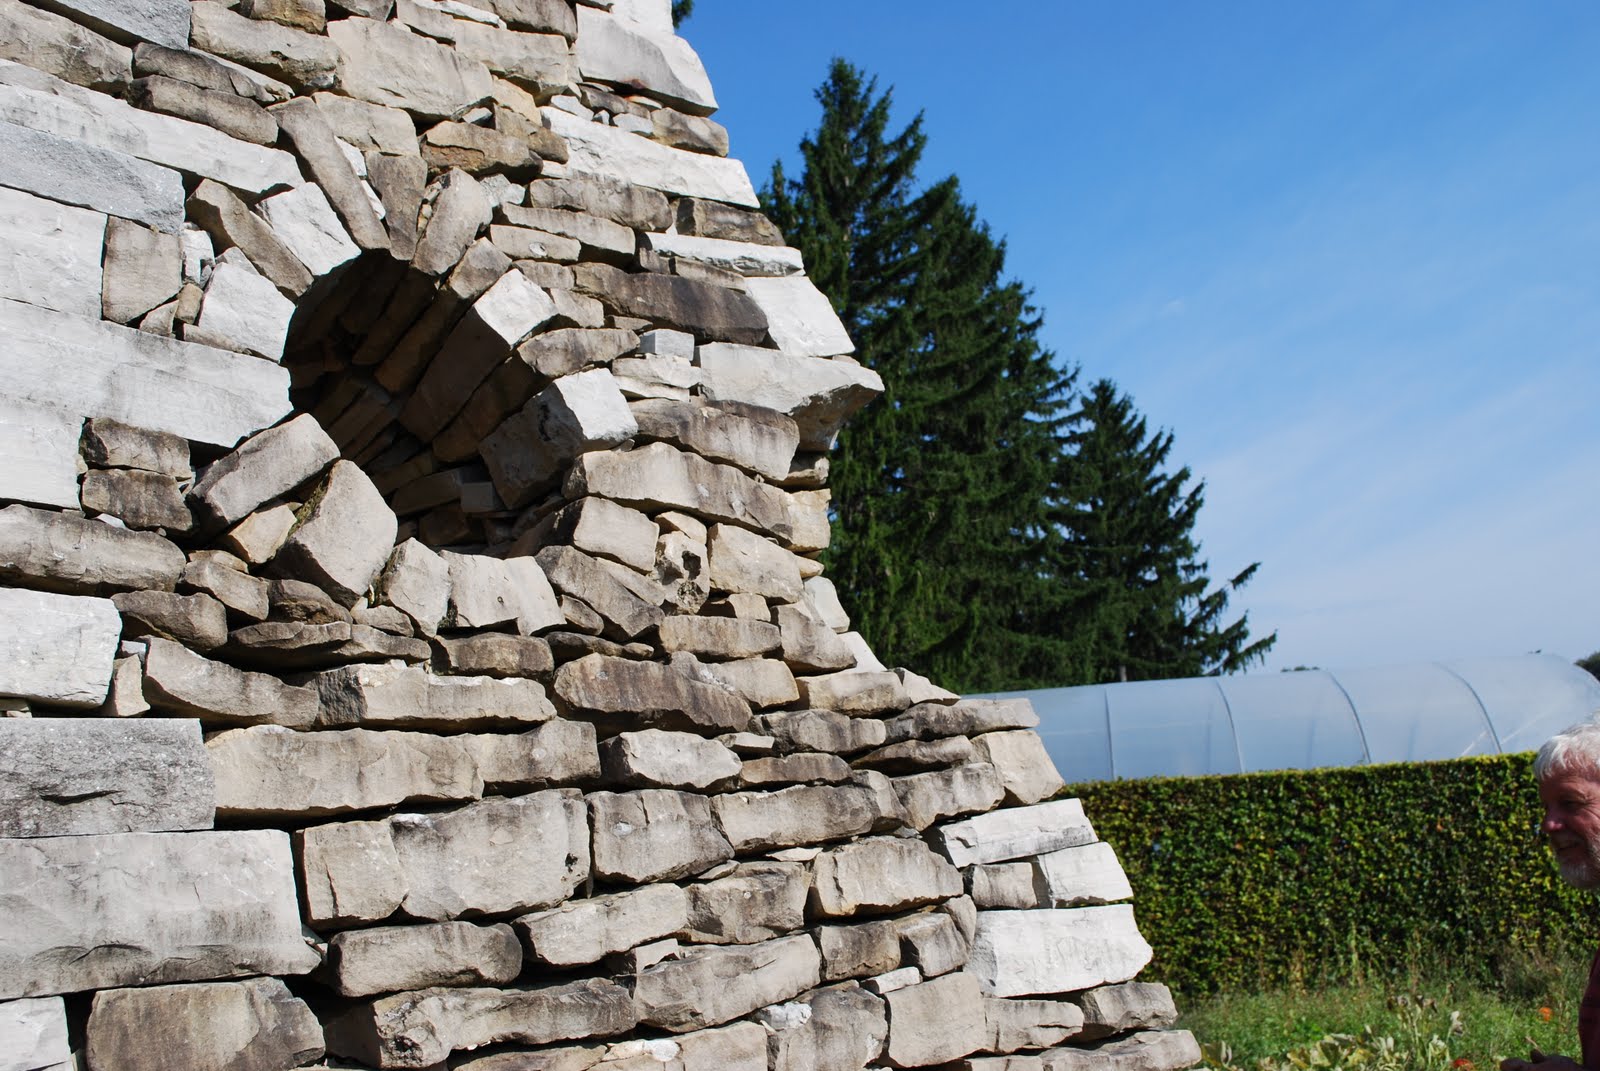 |
| The hole in the cheese wedge goes right through it and you can see the corbeling affect a little better in this picture. |
 |
| The Veg Wedge is near the horticultural schools student gardens and is covered in a luffa plant but is a fun free standing wall that was built with the intention that it should be used for plantings. |
We were a bit disappointed when we came upon what we were to rebuild, it actually didn't look too bad and it wasn't very high.
 |
| I forgot to take a picture of it before we started but in this picture you can see that we had only taken off the coping stones and the first layer of stone, so it was really not that high. |
We did get to take a bit of a break to learn how to shape the stone, which was perhaps the coolest part of the day. I had no idea that the stones were shaped before being used. Well, for the most part many of them are just used as is, if they have good facing and are deep enough to function structurally, but if they are not they are shaped to be useful and to create hearting (the rubble-ish stones that are used to infill a stone wall and create the friction between the front and back faces which makes dry stone walls so stable).
 |
| Here my classmate Geordie is "nibbling" away at the stone to create a more even surface. What's neat about this process is that all of the stone you remove is needed, because you will use it for hearting when you build the wall. It's a pretty ecological approach to building, which isn't often seen in any other construction. |
All this prep, both physical and philosophical, has really given me an appreciation for this art (which it really is). Before I had thought of it as just piling up stones, now after a few lessons in Stonehugging 101, I realize there is a definite strength in dry stone walling that is really quite beautiful because it works with the natural world and with little manipulation, we can use physics to create something that will do a job for many many years and be beautiful doing it, without mortar or any other glue. Stones are definitely rockstars, in their own way. That's right, I said it, get over it.
No comments:
Post a Comment