Thursday, September 30, 2010

Restoration Heaven

So yeah...we saw the most amazing house today. Our geology instructor Bob happens to own the house that I have been lusting after since we first visited the niagara region. It is a beautiful stone house that he has lovingly and painstakingly and perfectly extended, restored and conserved. This is the kind of project I am sure every skilled tradesperson dreams of being able to work on but is like a one in a billion project.

The front of Bob's house. Isn't it beautiful!
And the back. Also striking!  You can see the extension added on at the far left hand side.
Bob is a geologist who was raised in this area, but made his living in Calgary ('nuf said) and has retired back to this area. He is an incredibly sweet man and very very meticulous (two bound volumes on Niagara stone's worth of meticulous). We now are able to identify the stones that would have been quarried and used in this area to a tee. In fact, I'm pretty sure that we'll be whipping out our hand lenses and inspecting every heritage home, just to make sure that the write ups and plaques are accurate when they describe a building as limestone, because usually the plaques are wrong and they are dolomite or crazily whirlpool sandstone! Insane stuff, but now we know stone and all the unfortunate things that can happen to it when its not properly maintained - like when people use portland cement to repoint a wall. The results are nasty and heartbreaking, not to mention stone-breaking!

But the highlight of our day today was when our instructor gave us a tour of his home. It is a stone heritage house that he and his wife and a crew of 13 have been restoring and extending. The house is ah-mazing! And it was incredibly inspiring to see this kind of thought and painstaking care going into a building.

Being a geologist, Bob was very concerned with making sure that the right stones were used in the extension and in any of the replacement sills. Every piece of stone worked in the building - and there were a lot - was done as it would have been done originally by hand by a stonemason.
This sill happens to be from the last piece of whirlpool sandstone quarried from the Queenston Quarry. You can see the beautiful tooling and slight angling out of the sill. All done by hand!  The "crack" you can see in the sill towards the right side of the picture is actually very characteristic of whirlpool sandstone, it is where a shale pebble would have been and has now eroded, because it was much softer.
Even the landscaping edging is hand cut and tooled! With a mitred edge! 
There have been so many thoughtful and innovative solutions that have resulted from this restoration. All of the air intakes and vents are hidden beneath or behind the eavestrough. They even had a 'smokehouse' built to house all the ugly utility meters so that they wouldn't be visible inside (also all of the utilities are buried, so there is not a single ugly wire coming into the house).
The 'smokehouse'. They even built in fake windows that were bricked up from the first (with sills and everything!) for  the utility meters that have to be read from the outside.
The same care that Bob and his wife have had for the outside has been carried on inside. The floors have all been plank by plank stripped and recoated 8 times, individually! Walls that were external and had a coating of soot but are now inside, have been painted to look like the stones were always inside (i.e. never touched by soot - he assured us they did try to clean them but it didn't work). In the basement they stripped the whitewashed stone, but couldn't get all the different coloured coats of lime off, so new walls were mottled with similar bits of lime, to make the effect continuous. All of the outlets are recessed into the baseboards, with tiny little doors over them - so  they are not intrusive and historically inaccurate.

The tiny doors on the recessed outlets.  A corded outlet comes out when you need it and then just tucks away. Amazing detail!
 The stone detailing is absolutely beautiful inside as well. Every washroom has a beautiful all-stone shower stall. Every fireplace has beautifully tooled stone surrounds and hearths. And the new extensions have gorgeous lintels and sills in the doorways.
The shower in the basement bathroom. Insanely gorgeous!
The stone lintel that over the doorway that leads to the conservatory. It is so beautifully hammered,  producing the mottled effect in the centre of the lintel.  This is also the room that had the walls painted to cover the soot. Can you tell those stones are painted? or were ever covered in soot?
This a properly built, in working order, Rumford fireplace, renowned for its incredible draw (created by a very narrow chimney and side walls), this type of fireplace is rarely seen these days, but it is supposed to be incredibly efficient. You can see the freshly plastered chimney breast. It was old-school plastered by the man who will be teaching us about plaster later on, it incredibly takes a year to cure before painting. You've got to have some serious patience with this kind of work. All of Bob's house was plaster on stone where possible, except for two instances when drywall was necessary. He says that it makes for a very easy house to heat and cool. They didn't even put in air conditioning, it is that great.
Even all of the light fixtures are rewired restored originally gas fixtures and they are all incredibly gorgeous. They are from a man who does them all by hand at Ruth Jones Antiques in St. Catharine's.

Two of the many beautifully restored light fixtures in Bob's  home.   Everything just feels so authentic!
I can't even begin to explain how incredible it was to have the opportunity to see such a project (almost completed) and to witness such a great respect and love of history and built heritage. I think that the tour of Bob's house really inspired all of us today, and showed us that there are people not just all us crazy conservation students, who do really appreciate traditionally and skillfully built homes. I'm pretty sure that a landing a project like this would be like going to restoration heaven.

Sunday, September 26, 2010

No pain, no wall...I mean, gain

On Friday we finished the dry stone wall we had started on Thursday. The job was fun, but very hard work.  Surprisingly, it was my thighs and wrists that hurt the most. Thank goodness we spent a lovely and relaxing weekend in London, ON, visiting with Tim's family and I am mostly recovered now. I think that dry stone walling could start to be offered at gyms in lieu of weight training from the burn I was feeling, but we got the project done and now you can go and see it for yourself at the Niagara Parks School of Horticulture any time you are in the area and you can think of all the pain that went into it! It was a rewarding experience though, the concepts are really quite easy to learn and I think with a little more practice I could be semi-good at making a dry stone wall on my own. I think it's a great skill to have in my back pocket for when we actually own our own property.

Here is a picture of the wall completely ripped apart:
After pulling out the completely buried pieces of stone on Thursday, we made sure to properly prep the wall before rebuilding it. You can see the gravel and landscaping fabric which will keep the stones from becoming completely buried in soil again.

And here is a picture of the finished project:
Yes, that is Geordie doing his best modeling pose on the finished wall, while Dorothy in the background actually is continuing to shim wiggly stones. I'll leave you to pass judgement, on both the pose and the wall.

Thursday, September 23, 2010

Stonehugging 101

Today we had our first of two days of classes where we learn to build a dry stone wall. And... I am exhausted.

Our instructor, John Rimmington-Shaw is a wonderful man who was previously a stonemason but became disenchanted because so many people have gone towards decorating with stone, i.e. creating facades, instead of using it structurally. He went to the UK to learn how to build dry stone walls after experimenting  a bit on his own property and is now the founder and president of the Dry Stone Wall Association of Canada. (If anyone is interested in learning the art of dry stone walling, John leads demonstrations and classes all over the place you can find links to the classes on the dswac website linked above.)

After teaching us the basics in about an hour we set off to the School of Horticulture on the Niagara Parkway, which is a gorgeous place to take walks if you are ever in the area. We started off by looking at some garden sculptures or follies, that John and other groups had previously built. They call them respectfully, the Cheese Wedge and the Veg Wedge:

The Cheese Wedge: It's very hard to see in this picture but there are is a hole through the centre of it and  cool corbeling at the sides, so that it looks like a big slice of swiss cheese. (It is also in a pumpkin patch, which is cute.)
The hole in the cheese wedge goes right through it and you can see the corbeling affect a little better in this picture.

The Veg Wedge is near the horticultural schools student gardens and is covered in a luffa plant but is a fun free standing wall that was built with the intention that it should be used for plantings.

We were a bit disappointed when we came upon what we were to rebuild, it actually didn't look too bad and it wasn't very high.

I forgot to take a picture of it before we started but in this picture you can see that we had only taken off the coping stones and the first layer of stone, so it was really not that high.
So we kind of slacked a bit, and took a long lunch, thinking that we'd have it rebuilt by the end of the first day of class and have tomorrow to build arches and play with stone. Little did we know, that there were 3 extra layers of stone beneath the soil, embedded in clay. By the end of today we had only removed all the stones and prepped the base with new gravel and landscaping fabric to keep the soil away from the stones. I was so tired and blistered and heat-stroked (what is with the last push for summer coming on the day we are shoveling in full-sun?!) that I didn't even have enough energy to take pictures of the prepped area, but those will be supplied tomorrow, I promise!

We did get to take a bit of a break to learn how to shape the stone, which was perhaps the coolest part of the day. I had no idea that the stones were shaped before being used. Well, for the most part many of them are just used as is, if they have good facing and are deep enough to function structurally, but if they are not they are shaped to be useful and to create hearting (the rubble-ish stones that are used to infill a stone wall and create the friction between the front and back faces which makes dry stone walls so stable).
Here my classmate Geordie is "nibbling" away at the stone to create a more even surface. What's neat about this process is that all of the stone you remove is needed, because you will use it for hearting when you build the wall. It's a pretty ecological approach to building, which isn't often seen in any other construction.
Earlier, when we were learning the basics of dry stone walling at school, John had given us some philosophical pointers about stone and the art of dry stone walling. He encouraged us to slow down and take our time with the stones. He likened them to wild animals, which you wouldn't make sudden moves around and approach quickly, as that's when they would be tempted to bite you or in the stone's case, jump on your foot! He also encouraged us to listen to the stones, because they would tell you where they needed to be tapped and where they wanted to go in the wall. He assured us that all stones really want to be part of walls and are willing participants, we just have to let our hands think for us and suspend our spatial disbelief, because the stones will find their spot in the wall. John's blog has more on the "consciousness" of stone and how one should approach the stone characters of a wall, as well as some beautiful pictures of projects he has worked on and excerpts from a novel he is writing about stones in a dry stone wall and the process of dry stone walling.

All this prep, both physical and philosophical, has really given me an appreciation for this art (which it really is). Before I had thought of it as just piling up stones, now after a few lessons in Stonehugging 101, I realize there is a definite strength in dry stone walling that is really quite beautiful because it works with the natural world and with little manipulation, we can use physics to create something that will do a job for many many years and be beautiful doing it, without mortar or any other glue. Stones are definitely rockstars, in their own way. That's right, I said it, get over it.

Tuesday, September 21, 2010

Mortices and Tenons and Pegs...OH MY.

For the last two days we've been learning about Timberframing, like old school, like so cool. Apparently I am now a heritage construction and conservation nerd and I'm pretty sure I could sit and make pegs all day on a peg bench. That's right, a peg bench (see below). Or I could alternatively, be the underdog and take the box on the pit saw - cuz I'm a natural, and I'd have a wicked upper body after doing it for like a week. Timber framers are insane! Or at least old school ones are.

Our instructor Dan Addey-Jibb is an anglophone from Quebec, who studied Marketing in university and then decided to become a timber framer. He apprenticed in England and Scotland and has worked on a tonne of super cool amazing projects in Europe. When he came back to Canada he set up a company that does old-school-scribe-method-medieval-on-your-butt timber framing, and it is amazing. His company mainly builds residential houses, but they have done some amazing reconstructions of historical barns and some really great conservation on historic buildings. You can check out a fantastic time-lapse video of the raising of a huge barn in Quebec that they just recently restored, and you can look through his gallery at www.heavytimberwork.com.

Yesterday, we learned about the history of timber-framing in Europe and touched on the differences between the European-style scribe method and the North American style of square method. As per usual the North American style is not as cool or authentic. So I'm going to have to choose sides and go scribe method all the way. It's way prettier! We also got to look at pictures of all of the amazing projects that Dan has worked on, which was sooo freaking cool. Dan showed us the work of one of his colleagues in Ireland, who is amazing, insanely amazing, he even does his own carving. You can check out a video of work he did on Claregalway castle. It'll blow your socks off!

Today we got to go outside and make stuff and play. Yay! We got to look at some real mortices and tenons, and ask a bunch of silly questions about silly old english names for things. Apparently etymologically all those sayings about being Top Dog, the Under Dog, being "in the pits" and such, all come from working on the pit saws. We got to do that. It was totally awesome, and a serious workout.

Two of my classmates on the pit saw. Since it's a demonstration set, they have built these tripod saw-horse type things to  approximate the height difference for the pit. When you are on top you are Top Dog, when you are on the bottom you are the Under Dog. 
Here we are making our own pegs on a really cool peg bench. That was fun. We split the wood and then  used a scraper to shape it and a chisel to point it. It was really neat, and I got to keep mine. It'll definitely come in handy should a vampire attack, since most of our pegs ended up looking more like stakes.

You can see my classmate Kristina making a peg on the peg bench, which was a pretty cool thing in itself. It detaches for portability and works really well to hold the peg in place semi-permanently so you can rotate the peg and work on making it round. Alycia is in the background getting frustrated at the block we had to split our pieces off of to make the pegs.

We also massacred a log. We started off trying to get a feel for hewing by hand using axes. The piece of wood we had to use was not great though, it was from the previous year and it hadn't been stored properly so it was starting to rot and grow mushrooms, but we did the best we could. Though by the end of the day, after we had hewed what we could and tried auguring and making mortices and adzing (is that a verb?) the log was pretty much toast.

Here is one of us hewing. It's really quite tough to do, although I'm not sure the feel of it was accurate considering the state of the log. I'd really like to try doing it on a new green log just to see how it feels.
At the end of the day we went on a little field trip to a barn in Fonthill, ON. The documentation group had documented the barn during the summer and it was a really interesting example of the meshing of North American styles with a bit of Old World ingenuity. The lovely woman who owns the barn was gracious enough to let us crawl over every inch of the barn and explained that it had been built in 1885. Unfortunately she doesn't have the resources to restore it and it will likely fall to ruin because the township she is in won't let it be taken down and rebuilt elsewhere since it has been designated an historic building. This is an unfortunate result of some historical designations. Inevitably saving a building for posterity doesn't do any good, because it will likely come tumbling down because those who make the historical designations don't give out any money to maintain them.

A lovely barn, but it's in a state of disrepair. There is a bulge on one side of the stone wall and some of the supports inside are starting to fall down. The style is quite unique, with the dormers, the steep slope and the half-gambrel, half hipped roof.

One of the most interesting features were these huge pulleys. There were two, located in the middle of the building towards the front (southern-facing). They were used first by horse power, then by tractor, to hoist up a wagon so that hay could be off-loaded onto the upper level of the barn. Dan had never seen anything like it in Quebec, though the owner said she'd seen another like it in Bright, ON. 
All in all, our last two days have been wonderful. I've really enjoyed getting to get in there and getting a little sweaty and full of wood shavings. As well as working-in my work boots by trudging around through twenty year old "compost" and hay. I think that I'm in love with timber framing and will be forever, at least  until we have our dry stone walling class on Thursday and Friday. Oh, be still, my fickle heart.

Saturday, September 18, 2010

Rose hip syrup... why I can't wait to get the sniffles.

We had my best friend and her husband over for dinner tonight along with their 1 1/2 year old. It was great to be entertaining again. We had a great meal, which I neglected to take pictures of but it was an Italian feast of risotto, balsamic glazed pork loin, stacks of roasted vegetables and homemade baguettes. I decided to make Panna Cotta for dessert, which will be my go-to for every occasion now that I know how simple it is and that it can be made ahead of time.

I wanted to make the panna cotta special though, so I decided I would use up some of the rose hips on the gigantic rosebush we have growing outside. I had read about making rose hip syrup somewhere and thought it would be just the right thing to add a little country flair to my Italian dessert. I didn't really use a recipe, I just went with what I've done before to make fruit syrups, though I had to modify my approach to the very hard rose hips.

First I picked about a pound of rose hips and rinsed them thoroughly three or four times since the ends where the interior of the rose would have been were really quite prickly and fell apart easily.


I cut the tips and bottoms off of each rose hip and then covered them with water and set them to boil for about 15-20 minutes. Once they had absorbed all of the water I was able to mash them.


Once again I covered the mash with water and set it to boil for about 10 minutes and then let it steep for half an hour. I then strained the pulp out, added a 1/4 c. of sugar and let it simmer away until it was a nice syrupy consistency.

I let this cool and was left with a delicious tangy sweet but very subtle syrup that was the perfect compliment to the rich vanilla panna cotta. We dug into them so quickly that I didn't get a picture of the final dessert but here is a picture of the finished syrup:


During WWII the Ministry of Food in England suggested parents make rose hip syrup to give to their children for an immune system boost. Apparently rose hips are very high in Vitamin C, and a spoonful of sugar helps the medicine go down. So now I have an excuse to make up another batch and keep it around to crack open when I start getting the sniffles.

The $9.00 Sideboard

We've been working on the dresser/sideboard for a while now. It has taken quite a lot of work to get it to somewhere where I actually like it. We've sanded it and painted it and then sanded it a bit more. I was hoping to get a distressed look, with white peeking through the grey. Unfortunately when I went to sand the final product instead of white peeking through, there is a weird green tinge wherever I have sanded. It doesn't look too bad from far away or in the not so great lighting of our living room, so we are going to live with it.

Here's what it looked like before:


And here is the finished product:


And in situ:


We will now be able to hang pictures in the room if we can figure out what to put in here. Not bad for a free dresser off of kijiji and an 'oops' can of paint that cost $9.00. I'll take a $9 sideboard anyday.

Thursday, September 16, 2010

Cultural Landscapes...Yeah, I'm in Love.

Our third and fourth day of classes were pretty sweet. We got to spend both with Julian Smith, the director of the program. He is one of the coolest people I've ever met - he's worked on so many amazing projects. I think that what really got me was how many of the places in Ottawa, that were part of my everyday life, Julian has had a hand in restoring. He has also done work all over the world on so many UNESCO world heritage sites. One of the most awe-inspiring of the heritage sites that he spoke of was the work on the Vimy Ridge Monument. The work was so technically precise and problematic, and the scale so huge it amazes me that this project ever ended, but it did and the results are spectacular and you appreciate it even more when you know (even in brief) what has gone into the result.

So Julian Smith is totally neat! It was great to hear his perspective on Willowbank and to hear that he totally supports this vision of it being a place that blurs the lines a bit; a place where the builder can speak to the design and the architect can get his hands dirty; a place where theory and practice are not mutually exclusive.

So the lecture yesterday and then the discussion today, focused on Cultural Landscapes. We had background into the biases common in conservation, the antiquarian bias, the commemorative bias, the economic/tourism bias and the ecological bias.

Briefly:

Antiquarian Bias
This view emerged first, in the 18th and 19th centuries. It viewed artifacts as important in and of themselves. The effort is put into conserving what is left of an artifact - be it a ruin or a piece of pottery - for  future generations to admire and study. The beauty is in the remainder, and there is an emphasis on leaving an artifact in the condition in which it was found. Within this bias the archaeologist holds the most power.

Commemorative Bias
Here the buildings and artifacts are secondary to conveying the historical ideals. The buildings or sites are restored to a specific time in order to commemorate an historical figure or era. This is a very powerful bias and Parks Canada actually judges physical heritage sites based upon their commemorative integrity. In this view the Historian holds the power, dictating the way things will be restored to align them with a historical ideal.

Economic/Tourism Bias
Here, there is often an emphasis on redeveloping from scratch - like Colonial Williamsburg or Fortress Louisburg in Cape Breton, or on facading. This is probably the most powerful force in conservation  and has spread to whole neighourhoods - i.e. Main Street 'revitalizations'. This bias places all the power in the architects hands because the end product is about the visual show since thats what people are paying for.

The fourth bias is what we spent the most time on and is the one bias, which Julian most supports and which is just emerging as an important perspective. This is the Ecological Bias. This view places an emphasis on the relation between objects; on the rituals which link artifacts not just within historic layers but also in the contemporary one.

This is where we began to discuss Cultural Landscapes, which may include a single dwelling or a whole region. They are hard to define as they exist culturally with the imagination but are embedded in places. So its not just about the historic place it includes the feelings/rituals ingrained in that place through cultural imagination.

This is an ecological view because it focuses on the health of the relationship between the artifacts and the rituals and promotes a balance between the two. One of the most interesting parts of this idea, was that the concept has been embraced and understood very well by the Aboriginal community. This I guess, is not really all that surprising, since, from my limited understanding of the Aboriginal worldview, the surroundings are already a part of the cultural perspective. I also like that this approach does not deny the validity of the contemporary use of a historic place because to do so denies the rituals that the contemporary inhabitants associate with the artifact/place/site.

This is also incredibly relevant because it allows for a new place/space to be dynamic and recognizes that there can really be no final use for any space. It allows for the impermanence of the human legacy. There is a recognition that every persons cultural understanding of a landscape is legitimate and important to that space. In other words, it allows for an authentic experience of a place and doesn't deny anyones access or enjoyment of a landscape.

This bias celebrates the rituals - the culture that surrounds an artifact and makes it relevant to people. It also recognizes that for different groups relevancy will be felt in different ways or not at all. It displaces the power from the Archaeologist, the Historian or the Architect, from the so-called experts and places the power within the culture to define what is important to them and create/celebrate culturally significant nodes where artifact is "inhabited" by the ritual.

I think I'm in love. Maybe I'm a post-modern after all.

Tuesday, September 14, 2010

Second Day of Classes: Awesome but Humbling

So, we had Architectural Drawing By Hand today. It was really cool. Our instructor, who goes by Molly was really great, especially since none of us had much idea of what we were doing. (The last  time I used a compass and protractor was probably in grade school!) It was kind of neat to hear how Molly came to instruct at Willowbank. She is a retired architect who, she told us, is old enough to actually remember and have been taught how to draw everything by hand and be able to teach it.

Everything these days is done with AutoCAD or Revit or some other modern software based design program. We'll get to learn how to  use AutoCAD later on to assist us in drawing up assessments but in keeping with Willowbank's philosophy we will focus entirely on drawing in 2D this year and we will do it all by hand. Next year we'll move into 3D drawings, but only after we get everything down pat this year.

So anyways, we did all geometric drawing today. It was mostly to familiarize us with our drafting tools and with our pencils and how hard we had to press to create the construction lines vs. the final lines. It was actually a lot of fun. I did feel like a complete dolt when I used the wrong triangle for my hexagon and trying to do simple area and perimeter formulas in my brain without a calculator. It's been a while since I've done anything I've found challenging. It was humbling, in a good way. But it was great to get to the end of the day and feel like I'd learned something that would be useful and fun to do every week.

These are my drawings from our first day of drawing. Look at all those beautiful shapes!

A lot of what we did was just reviewing common geometry but some it was kind of cool, like using the scale method to figure out how many stairs you might need for a given space. It was neat to do math-y type things I could grasp putting to use, especially since that is not how I think at all. This one right here is not math-y.

Monday, September 13, 2010

Oh, to feel young again...

Today, was my first day of class at Willowbank. We had a lecture from Dr. Doug McCalla from Guelph University. The lecture was on Upper Canadian history. It was a pretty broad overview, but addressed some of the main contextual history we'll be dealing with when we are assessing historical heritage sites in the Niagara region.
By the end of class my hand was killing me from taking notes for 5 hours but I was very happy overall. I'd almost forgotten how much I like learning and all the tangential thoughts that a class can produce for the rest of my day.
Being back in school has definitely made me feel a lot younger. Maybe it's because when I was a lot younger I was in school, but I like to think that it's because I'm really enjoying myself and am passionate about what I am and will be learning.
Tomorrow we get to start in on Architectural Drawing By Hand. I'm really excited to put my really expensive technical pens to good use! and to begin learning the practical tools for assessing heritage buildings.  I'll let you know how it goes.

Saturday, September 4, 2010

A Country Side Note: Bunnies and Banded Garden Spiders

Our first week in the country hasn't been spent indoors painting and painting some more. We've taken breaks to play with the dog and take drives along the concessions and parkway - gawking at vineyards and mansions.

In fact one of what will be my most memorable moments about moving in will have to be Tim's first countrification (I made up that word!) moment.

I'm from Northern Ontario - a city in Northern Ontario, mind you - but Northern Ontario nonetheless. I grew up spending the summers at my grandparent's camp ('cottage' for all you Southerners), playing with garter snakes and grass snakes that my brothers caught. Tim equates my childhood to being raised by wolves and as such believes that I am already countrified. And by contrast this is true, Tim is very very much a Southern Ontario city boy. This was confirmed this week when we had an issue with bunnies.

I'll start this off with the most disgusting part. Ulli loves bunny poop. Apparently it is an unbelievable succulent delicacy. To her it's like truffles and she even snorts around looking for them like a truffle-seeking pig. This past week she hit the mother-load of bunny-truffle-poop. We had been so proud of her because she seemed so interested in the outdoor dog kennel that came with the house. Retrospectively, she was interested in the kennel because it was housing bunnies and more importantly was a bunny poop snack bar.

While we were puttering around in the yard - praising Ulli's interest in her kennel - we heard a high pitched squeaking sound, which was followed by a great bit of excitement on Ulli's part. Her nubbin (our name for what's left of her tail) was just a-wagglin' and her snout was upon the source of the squeaking. She was totally thinking that a real live squeak toy, was like the coolest! Tim quickly ran into the kennel to see what was going on, he pulled Ulli back and lo and behold there were two itsy-bitsy bunnies squeaking before him. Both bunnies made a dash for it - one through the fence and into the vineyard - the other straight into the lily leaves in the middle of the yard.  This caused Tim to go into hysterics:

T- What do we do, what do we do, what do we do?!?!?!?
C - I don't know.
T - Well, we can't just let them go off, they'll get eaten by coyotes.
C - What do you want me to do?
T - Get the one in the vineyard. I'll get the other one.
C - Okay.
C -Now what?
T - Get the cat carrier, we'll put them in there. 
C - What?
T - The cat carrier, and then we'll bring them to the humane society.
C - What?

The bunnies spent a warm night in The Witten's carrier in the garage, while Tim came to terms with the fact that going into the city to bring them to the humane society was not a solution as they'd just as likely be euthanized there. Most likely they'd also laugh at us for bringing them in. I certainly got a great chuckle out of it. Tim even appealed to my desire to have livestock, which was a good try on his part. Except when I explained that he'd have to help me when it came time for killing them, he back pedaled quickly. So in the end, Tim trudged off into the vineyard to release the bunnies and I swear there were some watery eyes. But he did it. The bunnies are quite likely in a coyote's belly now. But Tim's just a little bit more country for it.

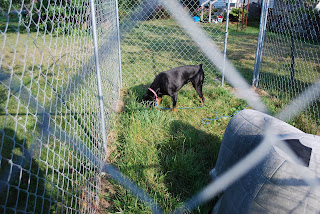
Ulli still goes into the kennel to see if the squeak toys are still there or  alternatively have left her some new truffles. The bunnies den was actually tucked right up beside the igloo. Some bunnies just love to live dangerously I guess.

The day after that was my turn. For all my being raised by wolves and such, things still surprisingly creep me out. But I think everyone would be creeped out by this on your door screen:


I'm usually okay with spiders. They are good for the garden and catch flies and all that, but this was different. Tim, on the other hand, hates spiders, which is something that I usually bug him about. But, this was the mother of all spiders. It was the most gigantic spider I'd ever seen, it was a good inch in the body and 3-4 inches with its legs. Uggh, it was gross, and the evil yellow and black on its body looked like a creepy little face. Our field guide said it was a harmless Banded Garden Spider, but I was not buying it. 

For the rest of the morning, I would fling open the door to let the dog outside praying that it didn't fall off the screen or - God forbid - jump on me! Eeek! By mid-morning, I'd had enough and insisted that Tim get rid of it. He owed me for all the spiders I'd gotten rid of for him. He very bravely got a shovel and attempted to move it elsewhere. It promptly fell through the cracks on the back stairs and now we get to live with the thought that that mother of a spider is living beneath the stairs! I've definitely been putting shoes on to go in the backyard ever since.

Friday, September 3, 2010

Moving in and Painting Some More and Unpacking...and painting some more...

At the end of August we moved into our new house!

We got up super early and with the help of Tim's dad, brother-in-law and some great friends (Thanks to all!) we had everything in the house by 3 pm. After we'd squared away the moving van and gotten our bed set up on the floor :( we collapsed with visions of paint rollers and drop-clothes in our heads.

We were able to finish the master bedroom almost immediately within the first couple of days. We painted it a yellow that's a few shades off from the kitchen. I really like it. When the sun sets at night it goes this lovely buttercream-y colour.

Here's a picture of the semi-finished product:


We still have a few things to hang on the wall and a have to find a couple of area rugs for beside the bed. I'm not looking forward to cold floors come winter.
After the master, I figured the next most important room was the kitchen. So we tackled the kitchen next. Here's the outcome here:


The only thing that I am unhappy about, is the bookshelf. I really would like a hutch type piece that can store our bigger countertop appliances below and our more decorative items at the top.  The only problem is this thing that sticks out on the baseboards of the wall. It's probably some old heating pipes or something but it sure is a pain in the neck. We've looked at all kinds of units and all that really will seem to work is a desk-y type thing, I was looking at this one from Ikea. But that doesn't really fit my country home. So we are going to keep our eyes open and maybe, fingers crossed, we'll stumble across something at an auction or antique store. The only criteria will really be that it has four legs with no crossbars and is high enough to fit over the 'bulkhead on the floor.' I don't really care what kind of shape its in because I'll likely paint it.

The other angle in the kitchen. You can see the 'bulkhead on the floor' in behind the rolling island, that's the area I would ideally like the hutch to be, since the other wall seems a bit crowded with the freezer and bookshelf.

Next came the study and the living/dining room. The study is pretty much done except for a pile of things to sell. I think that alphabetizing our books has been probably one of my favourite house chores to do so far. There is something so satisfying about organizing them all. There were a few arguments along the way, such as where to put multiple author, oversized, collected and special interest works but we figured it out. And arguing was half the fun!

The study is probably the room we've been spending the most time in. We're really digging the coziness of it.
Tim is especially happy with the wall of bookshelves - his idea! I'm particularly pleased because it didn't cost that much. We snagged the bookshelves on sale at Home Depot for a song - the smaller ones were $25 each and the larger were $40 each. That brought the total cost of the room to $225 since we didn't change the colour and had everything else given to us at some point. I'm very proud of our frugality!

The living/dining room is the room that I'm least pleased with so far. We've debated about recovering the sofa. It's sorta nice with the paint colour, but it doesn't really match the chair that I had upholstered before moving to especially fit in this space. We're also waiting on the 'sideboard' to be finished. It's really a dresser that I'm painting for the room but it isn't finished yet. And since it's not in the room yet we can't hang any pictures. So this room is still semi-semi-done. Here's the work in progress:

That's The Witten sittin' profile perfect! Anyhow, the sideboard will be going along the wall in the right hand side of the photo (the straight back chair with the phone on it is place-holding).  I am actually really quite pleased with the way the coffee table turned out. It was an old, old table we got off of kijiji for $15. We cut the legs down and voila, a gorgeous, shabby chic coffee table! We're debating on making it smaller (tabletop-wise) but the room is pretty big and I think it can take it.

Please don't mind our mess...we still have to find homes for some of the things in the background.  But from this picture you can see the couch, which I think goes well with the blue but doesn't really go well with the upholstered chair (see below).
You can see that the chair has lots of red in it, which I like, and some pink, which is also in the couch colours, I'm just not sure they go together.  Also, you can take a bit of a closer look at the coffee table and it's total awesomeness.
One of our last rooms was the guest bedroom. If you'll recall it was a bright blue. We toned it down with a taupe-ish colour and then added green accents. I'm quite pleased with the finished product. The only part that still needs work is the hanging rack unit. We'd hoped not to need it, but in a century house with no closets, extra hanging storage was definitely necessary. (I have a lot of coats, Tim has a lot of suits.) I have an idea for covering it but that will have to wait until all else is squared away.

Here's the spare room:


One of the on-going projects was finishing the accent pieces in the bathroom. The bathroom is quite big; we have been figuring that before indoor plumbing it was likely another bedroom.We weren't painting the room but I still wanted there to be an overall feeling of it being a casually blue room. Bathroom = water = blue. So we added a shelving unit and a screen to hide The Witten's litterbox and her food (we have to feed her in the bathroom otherwise Ulli eats it all).  I had made the shelving unit out of older pine planks that Tim's dad had, and the shelving unit was made with halved cedar louvred closet doors (the other halves were used to make boot boxes for our mudroom, which will be a much later project).

Here are those accent pieces:

You'll notice that The Witten has her own window (behind the screen), so she can eat her food with a view. 
Lastly is an area I've organized for some extra work space - the landing between the bathroom and the bedroom. It's mostly just storing all my artsy/crafty stuff. All we have to be on the hunt for is a light fixture and it will be perfect:


So that's the house so far. I'll keep posting on how it's going, as I'm sure we'll continue to adjust things. But it is feeling much more Home Sweet Home.

Thursday, September 2, 2010

Background. Our house search and our house.

After getting accepted into school at The Willowbank School for Restoration Arts in June, our search for a house began in earnest.

We had looked around casually before my admissions and had many discussions on how far away from the school we could really live feasibly. After deciding that I wouldn't be able to work while going to school everyday from 9-4p, we had decided we needed to live right in Queenston or within the ride-able/walkable vicinity, so that I could get to school on the days that Tim was out of town.

So we began our house search and unlike when we'd looked around before, there was nothing - nada! zilch! zero! Well, okay, there was a terrible two bedroom apartment in a building that looked like it was going to fall down, but with a cat and a dog, we thought that that might be a little tight. Plus, it didn't quite fit with our romantic visions of the country life we had been anticipating living.

My best friend, who also lives in the area, had been told to keep her eyes and ears open for any For Rent signs that we wouldn't come across living two hours away. And no sooner, had I almost resigned myself to the apartment I received a call from her, asking me if we'd like to live in a farmhouse that her in-laws happened to have vacant, just a few concessions away from the school.

Isn't the house adorable?

We gave a resounding "Yes!!! Hooray!! Yippee!!" and rushed back down to Niagara to take a look at the house. The house had everything we were looking for and more - not only was it huge for us - with a room we could dedicate to a full-time study and our very first guest room (we'd always had to split our guest room and office) but it had a huge fenced backyard for the dog, and area for a large garden AND was only minutes from school.

Before moving in we were lucky enough to be able to get in there and paint a couple of rooms and move in some boxes of books. Here are the pictures of the house nice and vacant, and newly painted (in the living room/dining room and kitchen) and just vacant everywhere else.

The Kitchen:

We painted it this yellow colour, it used to just be white. They had recently put in new cupboards and appliances. 
   The Living/Dining Room:                        
This is the view of the living/dining room from the front of the room. Note the gorgeous (original!) hardwood floors, we've been told that all the wood in the house used to be painted a horrible dark brown colour before they were stripped. The pine staircase was actually painted as well and was beautifully and painstakingly stripped by hand.


The Study:

The study, which is awesomely called 'The New Parlour'  on the breaker box, was already painted this deep dark red, which we really liked. So we've kept it, and think it is a nice contrast with the bluish colour in the living room.
The Landing:

The landing at the top of the stairs, is quite big. Note the beautiful pine floors and incredibly low but historical railings! I'm putting a little Crystal nook in there (where I can sew and keep all my handy/crafty things). I've already called this cozy spot, since Tim's already got dibs on the study being 'his spot.'


The Master Bedroom:
This is the master bedroom. Aren't the hip walls awesome! This is the same colour/suede finish that the living/dining room was before we painted it the bluish colour. We have plans for painting the master a yellow colour similar to the kitchen. So it'll be nice and sunny every morning!
The Guest Room:

This is the lovely shade of blue that the guest bedroom was, we've since painted it a bit more of a calming tan/taupey colour.

And the bathroom:
The bathroom isn't much to write home about. It's pretty modern, is humongous, and has a spot for a washer and dryer and an extra utility sink. So it's got everything we need. The standup shower is just to the left of the door when you walk in (it's just poking into the left part of the picture). That's me,  in my lovely painting clothes, reflected in the mirror!